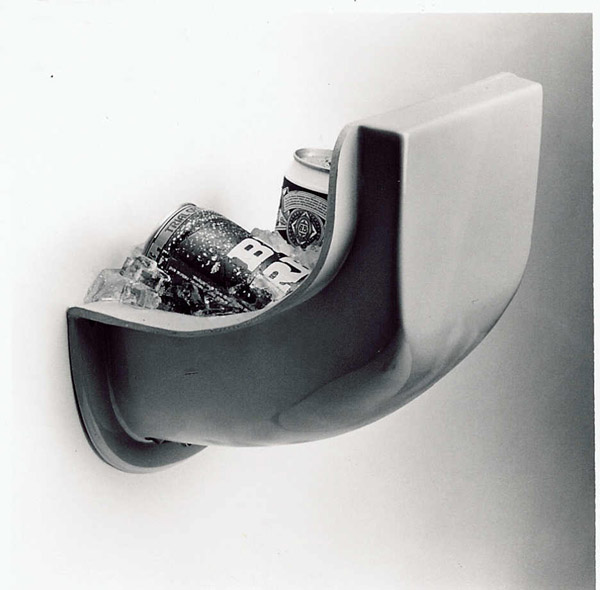
Schroth Fiberglass Motor Mount For J-24 Racing
Still Under $200
Click here>>Contact Fred to Buy a Motor Mount
Page hijack!!!.
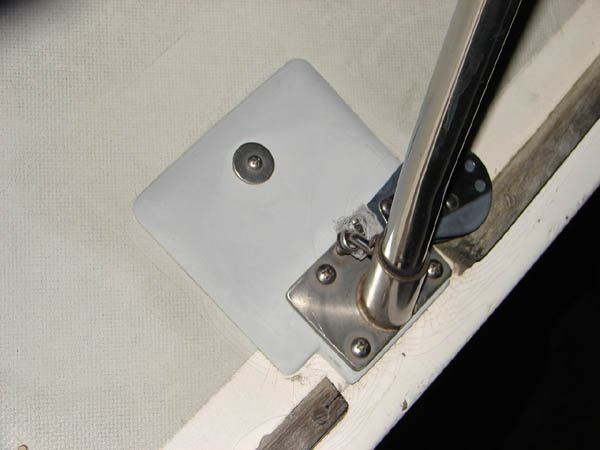
. This is our J-24 stanchion pad reinforcing plate. This is a December 2006 photo is of a pad that was placed on J-24 #187 for its seventh birthday. The plywood core beneath the pad was totally rotted way back in 1985. The pads cost only $100 a pair and anybody with basic tool skills, a drill, screwdriver and a couple wrenches can install them. Yes. we can also help with the additional fasteners and replacement nuts and bolts as necessary...Or install the kit for you.
End hijack of Motor mount page
Motor Mount Installation Instructions
You really ought to read this before you actually pick up any tools
Well, darn. It seems the original installation instructions were on my old 640 k computer. The file is saved on a floppy disc. I mean a real floppy disc…the old big ones that really did bend.
I had to write these new instructions. You will have to look at other boats to determine a correct mounting position. My mount works well for a Suzuki 4 from the 1980s.
If your motor is larger than a Suzuki 4, you may wish to place the mount further to the side then I have mounted my device on Psycho. You are welcome to hang your motor on Psycho to check the suitability of my installation position. If you live far away from Austin, come to Austin for J-24 Circuit Stop or the Easter Laser Regatta and measure my boat while you are here. Wherever you choose to place the mount, make sure that there will be space inside the boat for the fasteners to do their job.
Also. Want to get the thing level? Drill the bottom hole first. Then stand behind the boat and squat down while sighting over the top edge of the mount. When the transom top disappears over the top of the mount, you can tell if you have the mount level or leaned a bit to one side.
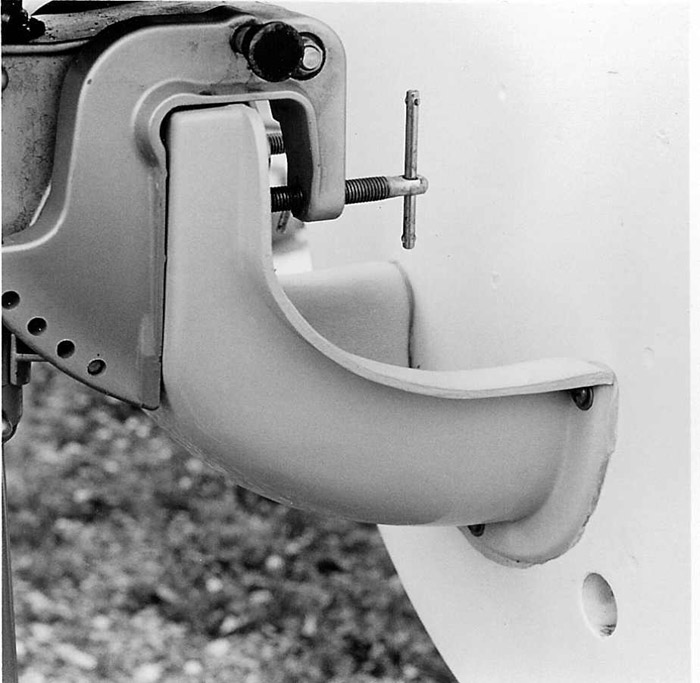
Once you know where level is, you can drill the two side holes. Be very careful with your drill chuck. It can easily rub on the side of the mount and scratch it. The best thing to do is to use the mount as a jig and just start the holes in the boat. Then remove the mount and drill the holes a little bit further. I mean just a little. See next step!!!
Replace the mount and see if the holes are really lined up. If the holes are a little off, and you have not drilled very far in, you can shove the bit sideways and get the alignment right.
Keep testing and be patient.
Actually fastening the mount to the boat: I really do recommend 3M 5200 sealant. The fast cure 5200 is fine. You should lightly sand the boat where the motor mount will be hiding those sanding scratches. Adhesion is a good thing!!
Use lots of the caulk. Caulk is for two things: sealing water out and adhesion. Caulk should ooze out in all directions. If the caulk does not ooze out in all directions, you almost certainly didn’t seal the fitting. (Be realistic. Do you really believe you can apply the exact correct amount and just have it squeeze to the edge? If the answer is no, make it ooze out and clean off the excess later.) Also, a bead of caulk on the inside of the mount helps 100% of the water drain out.
The big washers go inside the boat. The little washers go on the outside of the mount under the head of the machine screws. The screws are ¼ inch. I didn’t tell you that until now in hopes that you would not grab a drill and make holes before reading the entire set of directions.
If your transom squishes or any water comes out of the core, you need to stop and evaluate the condition of your transom. A rotted transom must be fixed or your motor mount will tear a big nasty hole that will cost a fortune to fix. If you have doubts, ask a professional boat repairman to have a look.
Note: I really don’t trust my motor mount. We have built over 100 and only one has come back broken, so far, but I worry anyway. (He used a 5 horse motor and was motoring around in big chop and the motor kept lifting from the water and reloading the mount when the free racing prop re-entered the water. That motor is in the bottom of Hefner reservoir or Lake Hefner…..whatever it is called)
Please tie a safety line from your motor to the stern pulpit. If the motor mount breaks, your motor will hang by the rope. Also, the rope is nice to have when you lose your balance while trying to tighten or loosen the motor mounting bolts. Motors on lake bottoms don’t make boaters happy.
Use tips:
1. Do not over tighten your motor’s mounting screws. Crushing the head of the mount will cause it to leak and the wood core will rot.
2. Do not leave the mounting bolts so loose that your motor falls off.
3. Keep an eye on the motor whenever it is running. They can jiggle loose or do other bad things.
4. Do not leave your motor on the boat when trailering…ever…bad idea!!
5. Do not stand on the mount. You weigh a lot more than a 4 horse motor.
6. Do not leave your motor hanging on the mount while your boat is stored at a yacht club. Yacht club members are notorious idiots. Yacht club members have no sense of personal property. They will be drawn to your new motor mount. They will be driven to perform tests. The last thing a yacht club member will ask himself before he breaks your mount and walks off will be,” I wonder how strong those plastic mounts are?”
7. Forever is a long time. I really do not expect the mounts to last until the end of time. If you see fractures, or the top of the mount becomes soft, tell me about it and I will inspect the mount and repair or replace it if necessary. We can haggle at that time about how long it lasted, what we all expected, and who should pay for the repairs or replacement.
Now that you have read all the directions, you can carefully install the mount and….
GO SAILING
May you always have enough wind to leave the motor under the side berth.